|
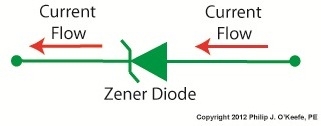
As we’ve come to know through this series of blogs, all electronic components pose some degree of internal resistance to the electric current flowing through them. This resistance results in electrical energy being converted into heat energy, heat which poses potential problems to sensitive components like electronic circuit boards. If things get hot enough, components fail and fires may ignite. To address these issues engineers design circuits with resistors whose job it is to limit the current flowing to electrical components. In this article we’ll see how a limiting resistor protects a Zener diode from this fate, allowing it to continue doing its job of regulating voltage. In our last blog we applied Ohm’s Law to our regulated power supply circuit, which makes use of a Zener diode. See Figure 1. Figure 1
Ohm’s Law gave us the following equation to determine the amount of current, IPS, flowing from the unregulated power supply portion, through the current limiting resistor RLimiting, and making its way into the rest of the circuit: IPS = (VUnregulated – VZener) ÷ RLimiting We learned last week that for the circuit to work, the voltage of the unregulated power supply portion of the circuit, VUnregulated, must be greater than the Zener voltage, VZener. Looking at the equation above, we see that the voltage difference is divided by RLimiting, the value of the limiting resistor in the circuit. This limiting resistor is there to constrain the current flowing to the Zener diode, allowing the diode to keep things under control within the circuit. Basic mathematical principles hold that if a smaller number is divided by a bigger number, the resulting answer is an even smaller number. Applying this principle to the equation above, if RLimiting is a big number, then IPS must be a smaller number. On the other hand the smaller RLimiting gets, the bigger IPS becomes. So what does it take for our circuit to fail? Remove the limiting resistor as shown in Figure 2 and the value for RLimiting disappears. In other words, RLimiting becomes zero.
Figure 2
In this case our Ohm’s Law equation becomes: IPS = (VUnregulated – VZener) ÷ 0 = ∞ The resulting answer is said to go to infinity, or ∞, as it is represented mathematically. In other words, without a limiting resistor being employed within our circuit, IPS will become so large it will overwhelm the diode’s current handling capacity and lead to circuit failure. Next time we’ll go over some advantages and disadvantages of this Zener diode voltage regulating circuit, and why the disadvantages outweigh the advantages for many applications. ____________________________________________ |
Posts Tagged ‘fires’
Transistors – Voltage Regulation Part XIV
Monday, October 22nd, 2012

Inside The Wall Wart
Monday, September 5th, 2011|
What would a cop show be without a crime scene, or better yet the obligatory dissection at the morgue? Forensic doctors performing autopsies have become commonplace, the clues they provide indispensable. Forensic engineers such as myself do much of the same thing, working our way backwards through time by dissecting industrial equipment and consumer products left in the wake of fires, injuries, and deaths. Let’s do some forensic dissecting now to see what’s in a wall wart and how it works. The inside of a basic wall wart is shown in Figure 1.
Figure 1 – Inside The Wall Wart You’ll note that a wall wart has four main components: a transformer, diode bridge, capacitor, and a printed circuit board (PCB). The PCB is constructed of plastic resin upon which is mounted copper strips. This makes a rigid platform base upon which electronic components are attached, namely the transformer, diode bridge, and capacitor. These components are soldered to the PCB, tying them together both mechanically and electrically. Now let’s see how the components of the wall wart work together to change the 120 volts coming from your standard wall outlet into the 12 volts needed to power a typical electronic device. We’ll use an instrument known as an oscilloscope to help us visualize what’s going on. See Figure 2.
Figure 2 – The Workings of the Wall Wart Transformer What is depicted in the graph above is the oscilloscope’s ability to receive an electronic signal, measure it, graph it, and then display it on a screen. This enables us to see how the signal changes over time. At Point A, which represents the wall wart plugged into a wall outlet, the voltage alternates between positive 120 volts and negative 120 volts upon entering the wall wart, which will now act as a transformer. The wall wart transformer then does as its name suggests, it transforms the 120 volts coming from the outlet into the 12 volts shown at Point B. You will note that this lower voltage also alternates between positive and negative values, just as the original 120 volts emanating from the wall outlet did. In one of my earlier blogs I explained that transformers only work when the electricity passing through them alternates over time. (Click here for a refresher: Transformers ) High voltage alternating electricity in one transformer coil creates magnetic fields that induce alternating electricity at a different voltage in a second transformer coil. So when you put alternating voltage into the transformer, you get alternating voltage out. But that’s not the end of the story. Many electronic devices operate on voltage that doesn’t alternate. What then? Will our handy wall wart still be able to bridge the electrical gap to fill our needs? Next time we’ll see how the diode bridge and capacitor come into play to deal with the alternating voltage from the transformer in a manner eerily similar to a microwave oven’s high voltage circuit. ____________________________________________ |


