|
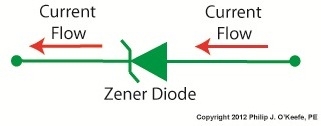
Last time we learned how the Zener diode, an excellent negotiator of current, is involved in a constant trade off, exchanging current for voltage so as to maintain a constant voltage. It draws as much current through it as is required to maintain a consistent voltage value across its leads, essentially acting as voltage regulator in order to protect sensitive electronic components from power fluctuations. Now let’s revisit our example power supply circuit and see how Ohm’s Law is used to determine the amount of electric current, IPS, that flows from the unregulated power supply and why this is important to the function of the Zener diode. See Figure 1.
Figure 1
If you’ll recall, Ohm’s Law states that current flowing through a resistor is equal to the voltage across the resistor divided by its electrical resistance. In our example that would be IPS flowing through to RLimiting. In fact, the voltage across RLimiting is the difference between the voltages at each of its ends. Applying this knowledge to our circuit, the voltage on one end is VUnregulated, while the voltage at the other is VZener. According to Ohm’s Law the equation which allows us to solve for IPS is written as: IPS = (VUnregulated – VZener) ÷ RLimiting And if we have a situation where VUnregulated equals VZener , such as when the voltage of an unregulated power supply like a battery equals the Zener voltage of a Zener diode, then the equation becomes: (VUnregulated – VZener ) = 0 And if this is true, then the following is also true: IPS = 0 ÷ RLimiting = 0 In other words, this equation tells us that if VUnregulated is equal to VZener, then the current IPS will cease to flow from the unregulated portion of the circuit towards the Zener diode and the external supply circuit. Put another way, in order for IPS to flow and the circuit to work, VUnregulated must be greater than VZener. Next week we’ll continue our discussion and see why the resistor RLimiting is necessary in order to prevent the circuit from self destructing. ____________________________________________ |
Posts Tagged ‘current’
Transistors – Voltage Regulation Part XIII
Monday, October 15th, 2012
Transistors – Voltage Regulation Part VII
Monday, September 3rd, 2012| Back when television had barely escaped the confines of black and white transmission there was a men’s clothing store commercial whose slogan still sticks in my mind, “Large and small, we fit them all.” It’s a nice concept, but unfortunately the same doesn’t always apply to electronic power supplies.
Last time we learned that when the electrical resistance changes on an unregulated power supply its output voltage changes proportionately. This makes it unsuitable for powering devices like microprocessor chips, which require an unchanging voltage to operate properly. Now let’s look at another shortcoming of unregulated power supplies, that being how one supply can’t fit both large and small voltage requirements. Figure 1 shows the components of a simple unregulated power supply.
Figure 1
The diagram illustrates the voltage changes taking place as electric current passes through the supply’s four components, which ultimately results in the conversion of 120 volts alternating current (VAC) into 12 volts direct current (VDC). First the transformer converts the 120 VAC from the wall outlet to the 12 volts required by most electronic devices. These voltages are shown at Points A and B. The voltage being put out by the transformer results in waves of energy which alternate between a positive maximum value, then to zero, and finally to a maximum negative value. But we want our power supply to produce 12 VDC. By VDC, I mean voltage that never falls to zero and stays at a positive 12 volts direct current consistently. This is when the diode bridge and capacitor come into play. The diode bridge consists of four electronic components, the diodes, which are connected together to form a bridge and uses semiconductor technology to transform negative voltage from the transformer into positive. The result is a series of 12 volt peaks as shown at Point C. But we still have the problem of zero voltage gaps between each peak. You see, over time the voltage at Point C of Figure 1 keeps fluctuating between 0 volts and positive 12 volts, and this is not suitable to power most electronics, which require a steady VDC current. We can get around this problem by feeding voltage from the diode bridge into the capacitor. When we do that, we eliminate the zero voltage gaps between the peaks. This happens when the capacitor charges up with electrical energy as the voltage from the diode bridge nears the top of a peak. Then, as voltage begins its dive back to zero the capacitor discharges its electrical energy to fill in the gaps between peaks. In other words it acts as a kind of reserve battery. The result is the rippled voltage pattern observed at Point D. With the current gaps filled in, the voltage is now a steady VDC. The output voltage of the unregulated power supply is totally dependant on the design of the transformer, which in this case is designed to convert 120 volts into 12 volts. This limits the power supply’s usefulness because it can only supply one output voltage, that being 12 VDC. This voltage may be insufficient for some electronics, like those often found in microprocessor controlled devices where voltages can range between 1.5 and 24 volts. Next time we’ll illustrate this limitation by revisiting our microprocessor control circuit example and trying to fit this unregulated power supply into it. ____________________________________________ |

Transistors – Digital Control Interface, Part III
Sunday, July 1st, 2012| When I was in engineering school in the mid 1970s microprocessor chips were still a fairly new concept. Scientific calculators were the size of a brick back then, and they weighed almost as much, and there were no personal computers.
I remember doing homework on the UNIVAC 1108 mainframe computer at school. To program it I had to sit at a monster of a keypunching machine for which I punched an endless array of holes into paper cards. These holes acted as the programming logic to instruct the computer what functions to perform. The 1108 computer’s mainframe was so huge it was housed in an adjoining room the size of a house. Since the 1980s advances in microprocessor technology have increased computing power and dramatically reduced the size of components, making things like laptops, smart phones, and sophisticated electronic products possible. Last time we began looking at my design solution for the control of a machine which developed medical x-ray film and made use of a microprocessor chip to automate its operation. A field effect transistor (FET) acts as a digital control interface between its 5 volt direct current (VDC) microprocessor and a 12 VDC buzzer. Figure 1 shows what happens when someone presses the button to put everything into action and the microprocessor starts timing. Figure 1
With the button depressed the chip senses 5 VDC from the power supply on its input lead. This in turn signals the computer program to turn the product on. The program then begins counting down the minutes, all the while maintaining a 0 voltage output from the chip’s output lead. With no voltage present on its G lead, the FET does not permit electrical current to flow from the 12 VDC supply, through the buzzer, through D and S, and down to electrical ground. The buzzer remains silent.
Figure 2Figure 2 shows what happens when the program begins its 40-minute warming sequence. The chip raises the output lead voltage to 5 VDC and applies it to G, then the FET permits electric current to flow through it to ground from the 12 VDC supply and the buzzer. Now supplied with power, the buzzer sounds. Then, per programming instructions, after 2 seconds the program shuts off the voltage in the chip’s output lead, current is cut off, and the buzzer goes silent. Next time we’ll see how an FET can be used as an interface between a microprocessor and another higher powered device, that of a 120 VAC motor that’s used to move x-ray film through a series of processes within the developer.
____________________________________________ |


Transistors
Sunday, June 10th, 2012| Back in the 60s my dad spent about $25 to buy a small transistor radio. That was a lot of money in those days, but well worth it. The new transistor technology allowed for a much less cumbersome radio to be produced. No more lugging around big radios armed with heavy vacuum tubes. In the years that followed the word transistor became a household word. They were employed in a variety of ways within televisions and other electronic devices, increasing both their reliability and functionality.
So what is a transistor and what does it do? It’s an electronic component, developed in the late 1940s. The first transistor was about as big as a softball and crudely made. As such, it was too impractical for commercial use. Then in the l950s technological advancements made commercial production of smaller, high-quality transistors possible. Transistors enjoyed widespread introduction to the consuming mainstream in the l960s, and since then they’ve been made in many different types, shapes, and sizes. Some are shown in Figure 1 below. Figure 1
A commonly used type of transistor is called a field effect transistor, or FET, one of which is shown in Figure 2. The FET has three metal leads which allow it to be connected into electrical circuits. These leads are referred to as the drain (D), the source (S), and the gate (G).
Figure 2
FET’s control the flow of current within an electronic circuit. A good way to understand what they do is to consider the analogy of water flowing through a faucet.
Figure 3
Figure 3 shows a faucet, complete with valve and handle. With the valve closed the flow of water is completely shut off. If the valve is opened partway by rotation of the handle, a trickle of water emerges. The more the handle is turned and valve is opened, the greater the flow of water. The FET shown in Figure 4 operates a lot like a faucet, but with regard to electrical current. Figure 4
The FET controls the flow of current flowing through its D and S leads, but it does not employ a valve or handle to do it. Rather, flow rate is controlled by application of a small amount of voltage to the G lead. The voltage’s influence on the G lead influences the FET to permit current to flow in through the D lead, then out through the S lead. The amount of voltage applied to the G lead is directly related to how much current will be allowed to flow. In this example the D lead on the FET is connected to a 10 volt direct current (VDC) power supply. The S lead is connected to a flashlight bulb which is connected to electrical ground. If you will remember from previous blogs, electric current naturally wants to flow from the supply source to ground, much like water wants to naturally flow downhill. If the bulb was connected directly to the 10 VDC power supply, current would flow through unimpeded and the bulb would light. However, in Figure 4 the FET acts as a regulating device. It’s connected between the 10 VDC power supply and the bulb. When no voltage is applied to the G lead the FET acts like a closed valve and current is unable to flow. Without current we, of course, have no light. When a low amount of voltage, say one volt, is applied to the G lead, the FET acts like a partially opened valve. It permits a trickle of current to flow from the 10 VDC supply to the bulb, and the bulb glows dimly. As voltage to G increases the FET valve opens further, permitting more current to flow. The bulb glows with increasing brightness. When the voltage applied to G increases to the point the FET valve is opened fully, in our example that is 2 volts, full current is allowed to flow from the 10 VDC supply to the bulb. The bulb glows brightly. Generally speaking, the voltage required to be applied to G for control of current flow through an FET depends on overall design and the particular application within an electrical circuit. FETs are often used within electronic devices to turn things on and off, with no other function in between. Next time we’ll look at some example circuits to see how it’s done. ____________________________________________ |


Wire Size and Electric Current – Joule Heating
Sunday, March 20th, 2011| Ever take a peek inside the toaster while you’re waiting for the toast to pop up? If so, you would have noticed a bright orange glow. That glow is produced when the toasting wires heat up, which in turn creates a nice crusty surface on your bread or waffle. It’s the same phenomenon as when the filament inside an incandescent bulb glows. The light and heat produced in both these cases are the result of the Joule, pronounced “jewel,” effect at work.
To understand Joule heating, let’s first refresh our memories as to electrical current resistance. We learned previously that wire is not a perfect conductor, and as such resistance to flow is encountered. This resistance causes power to be lost along the length of wire, in accordance with this equation: Power Loss = I2 × R Where I is the electric current flowing through a wire, and R is the total electrical resistance of the wire. The power loss is measured in units of Joules per second, otherwise known as watts, “watt” denoting a metric unit of power. It is named after the famed Scottish mechanical engineer, James Watt, who is responsible for inventing the modern steam engine. A Joule is a metric unit of heat energy, named after the English scientist James Prescott Joule. He was a pioneer in the field of thermodynamics, a branch of physics concerned with the relationships between different forms of energy. Anyway, to see how the equation works, let’s look at an example. Suppose we have 12 feet of 12 AWG copper wire. We are using it to feed power to an appliance that draws 10 amperes of electric current. Going to our handy engineering reference book, we find that the 12 AWG wire has an electrical resistance of 0.001588 ohms per foot, “ohm” being a unit of electrical resistance. Plugging in the numbers, our equation for total electrical resistance becomes: R = (0.001588 ohms per foot) × 12 feet = 0.01905 ohms And we can now calculate power loss as follows: Power = I2 × R = (10 amperes)2 × (0.01905 ohms) = 1.905 watts Instead of using a 12 AWG wire, let’s use a smaller diameter wire, say, 26 AWG. Our engineering reference book says that 26 AWG wire has an electrical resistance of 0.0418 ohms per foot. So let’s see how this changes the power loss: R = (0.0418 ohms per foot) × 12 feet = 0.5016 ohms Power = I2 × R = (10 amperes)2 × (0.5016 ohms) = 50.16 watts This explains why appliances like space heaters and window unit air conditioners have short, thick power cords. They draw a lot of current when they operate, and a short power cord, precisely because it is short, poses less electrical resistance than a long cord. A thicker cord also helps reduce resistance to power flow. The result is a large amount of current flowing through a superhighway of wire, the wide berth reducing both the amount of power loss and the probability of dangerous Joule heating effect from taking place. Our example shows that the electric current flowing through the 12 AWG wire loses 1.905 watts of power due to the inconsistencies within the wire, and this in turn causes the wire to heat up. This is Joule heating at work. Joule heating of 50.16 watts in the thinner 26 AWG wire can lead to serious trouble. When using a power cord, heat moves from the copper wire within it, whose job it is to conduct electricity, and beyond, on to the electrical insulation that surrounds it. There the heat is not trapped, but escapes into the environment surrounding the cord. If the wire has low internal resistance and the amount of current flowing through it is within limits which are deemed to be acceptable, then Joule heating can be safely dissipated and the wire remains cool. But if the current goes beyond the safe limit, as specified in the American Wire Gauge (AWG) table for that type of wire, then overheating can be the result. The electrical insulation may start to melt and burn, and the local fire department may then become involved. That’s it for wire sizing and electric current. Next time we’ll slip back into the mechanical world and explore a new topic: the principles of ventilation. _____________________________________________
|

Transformers – Electric Utility Power Savers
Sunday, January 2nd, 2011| Each day millions of Americans start their mornings with coffee, brewed in a coffee maker, and a microwaved breakfast. They flick on the light and exhaust fan before starting their showers and blow dry their hair afterwards. Each of these acts of modern living is a small miracle. And if you’re like most people you can’t see the power plant supplying the power to your modern conveniences from your home, and how the electricity travels from the plant to you isn’t too clear.
Truth is the process of supplying our homes with power isn’t as straightforward as you might think, and the actual transmission of that power isn’t straightforward at all. To begin with, the wires used in power lines are less than perfect conductors of electricity. Along any given length of wire there are all sorts of imperfections in the metal, and these tend to resist the flow of electrical current. These imperfections will always exist to some extent, even with the best manufacturing techniques and quality control, and the longer the power line, the more resistance the power flow will meet. The result is loss of electrical power. If there weren’t some kind of compensatory action at work to rectify this, your morning routine wouldn’t be nearly so smooth. To address the problem of power loss electric utilities use step-up transformers, similar to the one in Figure 1. This enables voltage produced by the generator at the plant to be raised to a higher voltage, in turn enabling it to travel longer distances and remain effective.
Figure 1 – Electricity Leaving the Power Plant Goes Through a Step-Up Transformer For example, let’s say that an electric generator puts out 12,000 volts, and a step-up transformer raises that to 765,000 volts, enabling transmission to customers far away. If you will recall from last week’s blog, with electrical transformers, there is an inverse relationship between voltage and current. So, when a step-up transformer increases input voltage, it actually results in a lowering of electrical current. So how does this phenomenon aid in power transmission? Simply put, when there is less current flowing through the wires, there is an accompanying reduction in power loss over the long length of the transmission line. Let’s take a look at what happens when the power reaches our homes. Figure 2 shows a simplified distribution route from the power plant. Figure 2 – A Step-Down Transformer is Used to Supply Electric Utility Customers First, the higher voltage originating from the step-up transformer at the power plant is decreased by the use of a step-down transformer located in a substation many miles away at the other end of the transmission line. The use of this intermediary step-down transformer effectively lowers the voltage and at the same time raises the current at the other end of the line, the end where customers like you and I are waiting to use our hair dryers unimpeded. The path that the power follows is somewhat circuitous, but well planned out, with numerous strategically positioned distribution lines acting as the final leg of delivery. These distribution lines do what their name implies, they weave their way along streets and alleys, finally distributing electricity to customers. A step-down transformer located in a substation along the power transmission route allows this all to happen. It can readily convert the 765,000 volts being sent by the power plant to the 25,000 volts needed to feed distribution power lines. These, in turn, power individual homes, hospitals, etc. Now you obviously can’t plug a television into a 25,000 volt wall outlet located in your house, so another step-down transformer is required to temper it into power that’s both usable and safe. The one in our diagram is mounted on a nearby utility pole, and its job is to lower the 25,000 volts which it receives into a more manageable 240 and 120 volts, which is then fed into your home. That wraps up our series on electrical transformers. Perhaps the next time you flip that switch in your home, whether it be on your hair dryer, TV, or what have you, you’ll pause for a moment to reflect on the long path it has followed to make your life just a little bit easier. _____________________________________________
|

Transformers – The Voltage/Current Trade-Off
Sunday, December 26th, 2010|
As a child I considered the reindeer Rudolph, with his nose so bright, to be a marvel of engineering. Now an adult, I remain perplexed as to the mystery behind the self-generating power source behind his nose. Did it ever overheat? I wondered. Perhaps today’s discussion can shed some light on the matter. During the course of our discussion of electricity certain terms have been tossed about, like voltage and current. For some the distinction between the two may be unclear, and that is what we’ll be addressing today. Electricity is a rather abstract phenomenon, but you may consider the flow of electrical current through a wire to be much like water flowing through a garden hose. The water won’t flow unless there’s sufficient pressure behind it, and that pressure is supplied by pumps, either at your city water works or your personal well. Take away the pressure, and the water stops flowing through the hose. Electricity flows in much the same manner. It requires a pushing pressure to get it on its journey from power plant to home, and that pressure is voltage. Take away voltage, and the current stops flowing through the wire. Voltage is, of course, produced by an electrical generator at the power plant. Last time we saw how an electrical transformer can reduce high voltage to low voltage and how this process also works in reverse. But how can that be? How can low voltage be turned into high? Is it really possible to get “something from nothing”? Let’s take a closer look. When a light bulb burns out in your home, you routinely look at the bulb to see how many watts it is so you can replace it with the same type. But what exactly is a “watt”? It’s a unit of power, and the markings on the bulb tell you how much electrical power it consumes when you use it. Generally speaking, this electrical power is related to voltage and current by this formula: Power = Volts × Electrical Current Knowing this, if I have a 60 watt bulb in a table lamp, and I plug it into a 120 volt wall outlet, then how much electrical current is the lamp going to draw from the outlet? Using the formula above and a little algebra, we get: Electrical Current = Power ÷ Volts Electrical Current = 60 watts ÷ 120 volts = 0.5 amperes And believe it or not, this same formula that’s used to assess power of a light bulb also applies to electrical transformers. Basically, the power going into the transformer is equal to the power coming out. To see how this works, consider the example step-up transformer shown in Figure 1, which converts a low voltage to a higher one. By the way, “step up” transformers have all sorts of applications. For example, they are used by electric utilities to raise the voltage produced by a power plant to make it more economical to transmit to far away customers. We’ll get into that in another article.
Figure 1 – A Step-Up Transformer In this example the input voltage on the primary coil is stepped up from 120 volts to 480 volts on the secondary coil, and this works according to the formula we learned about in last week’s blog: NP ÷ NS = VP ÷ VS where NP and NS are the number of turns of wire in the primary and secondary coils respectively, and VP and VS are the voltages of the primary and secondary coils respectively. Plugging in the numbers we get: 50 turns ÷ 200 turns = 120 volts ÷ VS [(200 turns ÷ 50 turns) × 120 volts] = VS = 480 volts Okay, for the sake of our example let’s say that an electric motor is connected to the 480 volt secondary coil. We have an electric meter hooked up to the primary coil and we measure a 2 ampere (a.k.a. “amps”) electrical current flowing through it. Without having the benefit of another electric meter positioned at the secondary coil, how can we measure how much electrical current is flowing through it? The current flowing through the secondary coil is found by equalizing the power in the primary and secondary coils: PowerP = PowerS Another way of stating this is to say that electrical power is equal to volts times current, so the equation becomes: VP × IP = VS × IS where IP and IS are the primary coil and secondary coil currents, respectively. Plugging in the numbers and working a little algebra we get the electrical current in the secondary coil: 120 volts × 2 amps = 480 volts × IS IS = (120 volts × 2 amps) ÷ 480 volts = 0.5 amps This shows us that the current flowing in the secondary coil is lower than that of the primary coil. It is therefore obvious that the voltage increase in the secondary coil comes at the expense of electrical current that can flow through the secondary coil. Squeeze down on current, voltage goes up. Squeeze down on voltage, current goes up. The power flowing through the transformer stays the same. Conversely, step-down transformers reduce the voltage coming in, and thereby produce the reverse effect. There is an actual increase in current that can flow through the secondary coil. This principle exemplifies the tradeoff process which is often present in science and engineering. Next time we’ll explore how both step-up and step-down transformers are used by electric utilities to transmit power from power plants to its customers tied into the utility grid. As for Rudolph and his power source, that’s still under investigation. _____________________________________________
|


